Nylon Tracksuit Manufacturing Guide: Fabric, Fit, Color Blocking & Branding
A nylon tracksuit is one of the easiest garments in the world to make badly, and one of the hardest to make well. The shell is thin, the seams are visible, and nothing hides a lazy panel join.
A successful nylon tracksuit depends on four connected decisions: the shell fabric, the proportion of the jacket and the pants, the way color-block panels are constructed, and whether the branding method is compatible with the final shell. Get one of them wrong and the set still passes a photo review — but it will show up on the body, in the wash, or in a customer complaint about the pants not matching the jacket.
This guide follows those four decisions in the order a factory actually faces them, so you can brief a supplier, review a sample and approve bulk production with confidence.
Why Nylon Behaves Differently from Fleece
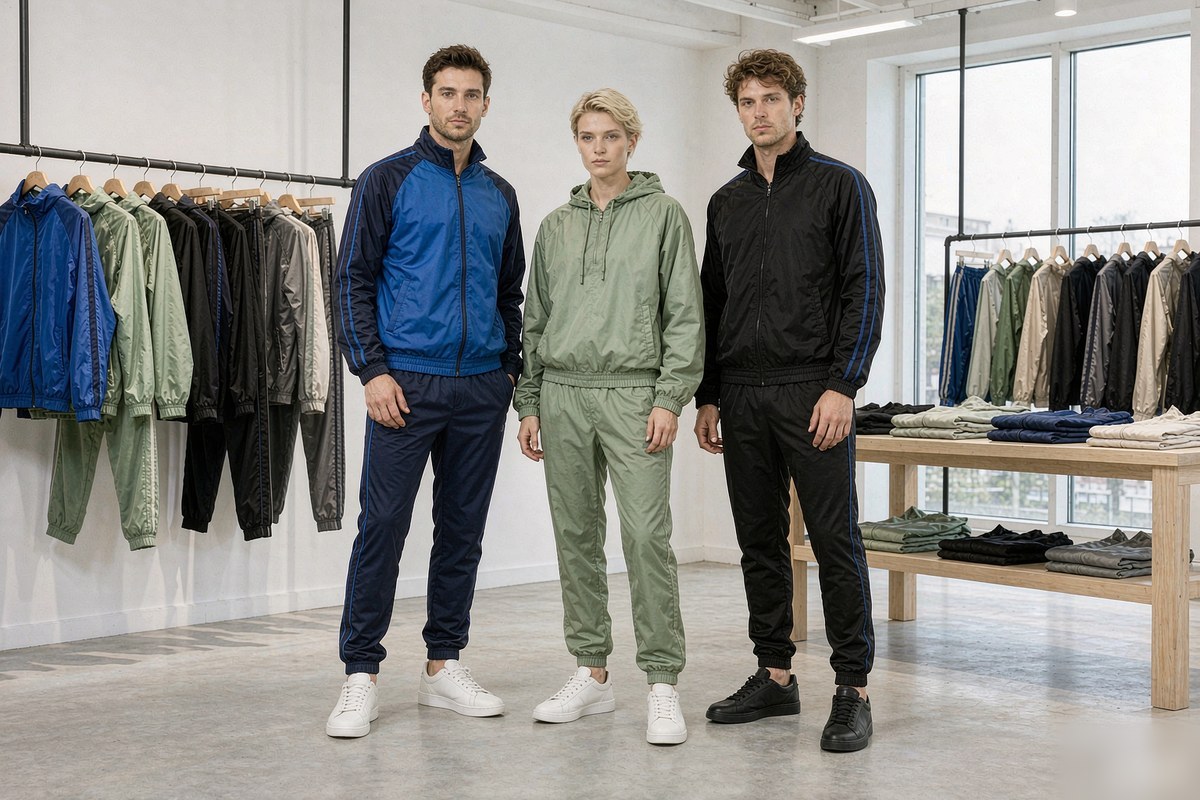
Nylon tracksuits remain commercially relevant because they combine a crisp shell, clear panel lines and lightweight construction in a way fleece cannot. For a brand, the useful question is not whether nylon is trending, but which shell, fit and construction details will make the set feel intentional rather than generic.
Think of it this way: fleece is clay, nylon is folded paper. Clay forgives small imprecision and holds volume. Folded paper shows every crease and every angle, and it holds a crisp line that clay never will.
That difference shows up in four practical places. Nylon holds a sharp panel line, so color blocking reads clean rather than soft. It resists wind, so the garment carries a functional story beyond styling. It packs small, which matters for travel and team kits. And it takes contrast trims — piping, woven tape, reflective strips — without looking over-built. If your range spans both materials, it also helps to keep the two lines visually distinct, which is easier to judge against finished references such as the fleece tracksuit range.
The trade-off is that nylon amplifies errors. A pucker at the zipper that would disappear into fleece becomes a visible wave on a smooth shell. That is why fabric selection and construction spec have to be settled together — and why the rest of this guide is organised around development decisions and the risks attached to each one. For a side-by-side view of how the three common tracksuit shells compare, the fleece, nylon and polyester comparison is worth reading before you commit to a direction. If you are at the stage of comparing suppliers rather than specs, start with our nylon tracksuit manufacturing capabilities and work backwards from there.
Nylon Shell Fabric: Construction, Weight, Finish and Hand Feel
Here is the mistake that sinks more nylon programs than any other: treating "nylon" as a fabric specification. It is a fiber. Two 100% nylon shells can feel and perform very differently because yarn size, weave or knit structure, finished GSM, coating, calendering and other finishing processes all affect hand feel, opacity, drape, noise and branding compatibility. For production, approve the physical shell you intend to use and record the construction, weight and finish rather than relying on "100% nylon" alone.
Taffeta, tricot, ripstop and crinkle are four different starting points
Nylon taffeta is a common track shell: smooth, light, with a faint surface sheen and a slightly dry hand. It is often compatible with several branding methods at once, but print adhesion, heat sensitivity and embroidery puckering still need to be tested on the production shell rather than assumed from the fabric name.
Nylon tricot is warp-knit rather than woven, which gives it a different stretch behaviour and drape. It sits closer to the body and can suit fitted or performance-leaning sets, though recovery and measurement stability deserve their own check.
Ripstop nylon carries a visible grid from heavier reinforcing yarns. It reads as technical and utilitarian, which suits utility-tinged streetwear. The grid is also a design element — it gives a solid color panel something to say on its own, but the grid scale has to be judged against your logo size.
Crinkle nylon is textured, with an uneven surface that catches light irregularly. Crinkle effects may come from yarn, construction or finishing processes, so confirm the exact bulk fabric and check texture consistency across the order rather than relying on the name alone.
Specify the whole construction, not one number
Denier describes yarn linear density, and it is useful — but it does not determine finished weight, hand feel, opacity or structure by itself. Two fabrics at the same denier can behave quite differently once construction and finishing are taken into account.
So specify the set of attributes together: fiber composition, fabric construction, finished weight, surface finish, and a physical swatch or reference garment. Denier can be added when it helps the mill hit the target, but it should not stand in for the specification.
| Fabric | Surface and feel | Strongest for | Check before approving |
|---|---|---|---|
| Nylon taffeta | Smooth, light, faint sheen, dry hand | Classic track jackets, first collections, print-heavy designs | Noise level, opacity in lighter colors, pucker at zipper and seams |
| Nylon tricot | Warp-knit, different stretch behaviour, soft drape | Fitted and performance-leaning sets, closer silhouettes | Recovery after wear, seam stability, measurement drift |
| Ripstop nylon | Visible reinforcing grid, crisp, technical | Utility and outdoor-adjacent streetwear, panel-led design | Grid scale, whether the pattern competes with your logo |
| Crinkle nylon | Textured, irregular light reflection | Statement sets, retro-inspired capsules, editorial pieces | Texture consistency across the order, embroidery compatibility |
| Matte or calendered | Smoothed or altered surface; final sheen varies | Private-label sets, minimal branding, monochrome programs | Evenness of finish, hand feel change, print adhesion |
These are development directions, not quality grades. A lighter shell can be the correct choice for a packable travel set. Judge each option against the intended wearer, climate and price position — not against a universal "better."
Finishing is where the surface changes
Calendering changes smoothness, density and surface appearance. It does not automatically produce a matte look — the final sheen depends on the process, the pressure applied and the base fabric. Similarly, a coating may add water resistance while changing breathability, heat sensitivity and print behaviour.
Whatever direction you choose, approve the finish on a production-representative swatch rather than a photo or a small lab scrap, and record it by name in the specification so a reorder does not quietly arrive with a different surface.
How to read a swatch like a buyer. Fold it, crumple it, and hold it against a window to judge opacity. Rub it against itself to hear how loud it is on the body. Then look at the reverse side, because that is what your customer sees every time they unzip. A shell that photographs beautifully and sounds like a chip bag will generate returns. The nylon fabric selection guide covers the same checks in more detail.
Matching Jacket and Pant Proportions
A tracksuit set is not two garments that happen to share a color. It is one silhouette split across two pieces, and it only works when the proportions agree. Most disappointing sets fail here — not in the fabric, and not in the color.
Why "one set" is a fit problem, not a color problem
Picture the jacket and the pant as two halves of the same drawing. If the jacket is cropped and boxy, a wide, long, stacked pant makes the wearer look bottom-heavy. If the jacket is long and relaxed, a tight tapered pant makes the top look borrowed. The pairing has to be decided deliberately, then graded together.
So the first question is not "what fit do we want?" It is "where do we want the eye to go?" Most brands want the jacket to read as the hero and the pant to support it. That means keeping the jacket's body length and shoulder line as the anchor, and choosing the pant's rise and taper to balance it rather than compete. The pant is half the set and carries its own development path, so it is worth treating track and casual pants manufacturing as a separate specification exercise rather than an afterthought.
Proportion map: jacket length, pant rise and leg taper
- Jacket body length: a cropped jacket needs a higher-rise pant to avoid a gap at the waist. A hip-length jacket pairs with almost anything.
- Shoulder and chest ease: decide how much extra room the jacket gets, then keep it consistent across the size range. Uneven ease is where sets start to look like two different garments.
- Pant rise: front and back rise define where the set sits on the waist. For unisex programs, this is the measurement most likely to break a range.
- Leg taper: a tapered leg with an elastic cuff reinforces the sport direction; a straight or wider leg with an open hem reads more streetwear.
- Hem and cuff treatment: elastic cuffs affect both the silhouette and the finished inseam. Approve them with the footwear in mind.
Sample review points for a set. Bring these to the first fitting instead of reviewing the jacket and pant as separate garments:
- Jacket length against pant rise, seen together on the body
- Shoulder width and sleeve pitch, checked in motion rather than standing still
- Pant rise, thigh ease and leg opening at the smallest and largest sizes
- Jacket hem position when worn over the pant, seated and standing
- Full size-set review as one unit, not two approvals
Grading two garments that must agree
Here is a detail that catches brands on their second or third drop: the jacket and the pant do not need to increase by the same increments. In fact, they usually should not. Shoulder width grows more slowly than the waist across a size range, and the rise needs its own rule entirely.
Treat the set as one graded unit in the review, not as two separate approvals. Check the smallest and largest sizes as a pair, on real wearers, sitting and standing. A set that looks perfect in the middle of the range can fall apart at both ends. If you are building a performance-leaning line, the performance tracksuit range shows how mobility-focused proportion choices play out in finished garments.
Color Blocking, Piping and Panel Construction
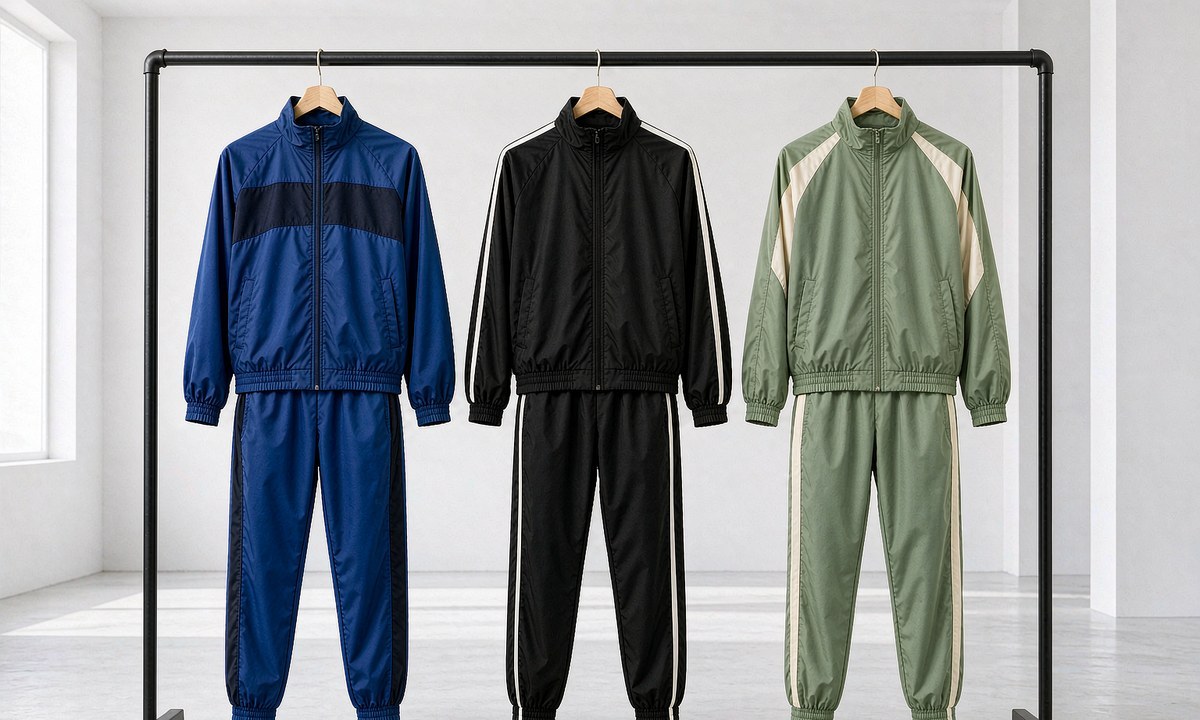
Color blocking is where a tracksuit earns its price, and it is also where brands spend the most money for the least return — because contrast is easy to add and hard to add well. This is the part of a tracksuit program where design intent meets pattern, cutting and sewing, and where small numerical decisions become very visible.
Three color-block approaches that work
The first is the yoke block: a contrast panel across the chest and shoulders, usually split horizontally. It is the classic retro-sport look and the easiest to execute cleanly, because the seam follows the natural shoulder seam line.
The second is the side stripe: a vertical contrast band running down the sleeve and down the leg. It is the most legible option from a distance and the most forgiving on a range of body types, which makes it a strong choice for team or wholesale programs.
The third is the contrast or asymmetric panel: different colors on the front and back, or a contrast sleeve on one side. This is the most fashion-forward and the most expensive, because it multiplies cutting and sewing complexity and makes fabric nesting harder.
Our own nylon tracksuit collection runs across all three approaches, which is useful as a reference exercise: look at how the panel lines change the perceived width of the jacket before you commit to a direction.
Panel alignment is a pattern, cutting and sewing problem
Two tracksuits can carry the same color map and still look like different products, because the visual line is decided by seam allowance, topstitch position and cut geometry rather than by color alone. These are the checks that separate a designed set from an assembled one:
- Seam allowance and topstitch distance determine how wide a panel line reads on the finished garment. A 3 mm change in topstitch distance is visible on a smooth shell.
- Left-right symmetry should be verified on the flat garment, not from a photograph. A stripe that drifts on one side is obvious in daylight.
- Front and back panel junctions have to meet at the side seam. Any step at that join shows immediately on a lightweight shell.
- Sleeve and pant stripe continuity matters on a matching set, where the two halves are read as one object.
- Cutting direction can produce different surface reflection between panels. On a fabric with any sheen, pieces cut in a different direction to the body can read as a shade difference even when the dye lot is identical.
For a matching set, panel alignment should be checked across the jacket and the pants as one visual system. A side stripe that sits 8 mm farther forward on the pant than on the sleeve can make the whole set feel inconsistent even when the colors are correct.
Piping and tape: width tolerance and wash performance
Piping is a narrow folded strip inserted into a seam. Tape is a flat woven band applied on top. Both create a line, but they fail in different ways, so they need different specifications.
For both, write down the finished width and its tolerance, the stitch distance from the edge, and the attachment method. Then wash the sample using the care method you intend to publish, and check that piping has not rippled and tape has not bubbled or lifted at the ends. A wavy line or a bubbling tape instantly dates the product, and neither problem is visible on a pre-wash photograph.
One decision worth settling early: printed panel lines never look like real panels. If the design depends on contrast between two fabrics, two colors or two finishes, it has to be cut and sewn as separate panels. Printing a line across a single panel is a cost-saving shortcut, and on smooth nylon it is a visible one.
Lining, Zippers, Elastic and Functional Trims
Trims are where nylon sets quietly succeed or quietly fail. Nobody puts a lining choice on a lookbook page. Everybody notices when a jacket feels sticky against a tee, or when the zipper waves down the front.
Lining choices and what goes wrong with each
Mesh lining adds breathability and reinforces the sport read, but it can show through a light-colored shell, so check opacity on the actual fabric. Taffeta lining gives a smooth, slippery interior that slides over a hoodie or tee, at the cost of some warmth and weight. Partial lining — upper body only, or the front of the legs — covers the areas that touch the body without paying for full coverage. No lining is the lightest option and makes inside seam finishing the priority.
Whichever you choose, check the lining drop at the hem. A lining cut slightly too long hangs below the shell; cut slightly too short, it pulls the hem out of shape. Both are common, and both are visible whenever the jacket is worn open.
Zippers: fit, function and the bottom stop
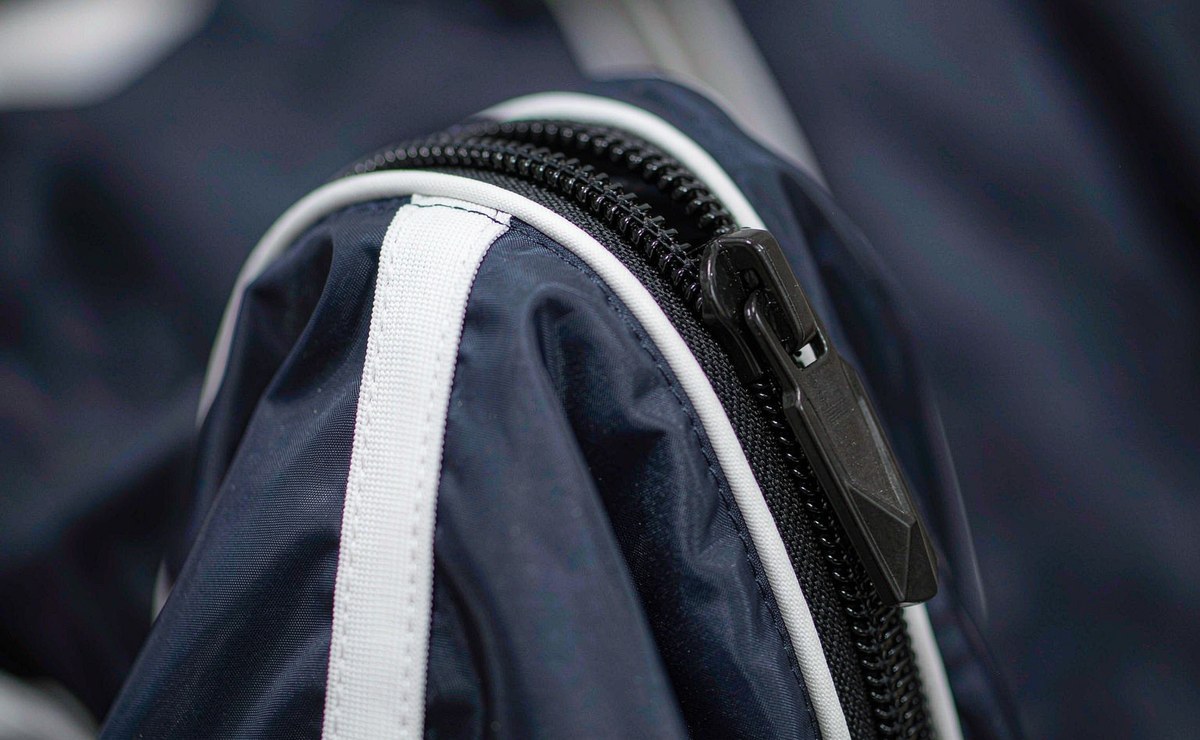
A zipper that is too heavy for a light taffeta shell will pull the fabric into a wave. A zipper that is too light for a structured ripstop will feel flimsy and can fail early. Match the zipper weight to the shell, then confirm the tape color, the puller and whether you want it branded.
Zipper tape is dyed separately from the shell, which makes it one of the most common sources of a color mismatch on a set — so include the zipper in the color approval, not just the fabric. On the sample, zip and unzip the jacket ten times and look specifically at the bottom stop. That is where waviness and distortion appear first, and where a marginal zipper choice becomes obvious.
Trim failures to catch at sample stage
- Elastic twisting inside the waistband: check that the elastic cannot rotate within its casing after repeated wear and washing.
- Rib recovery after stretch: pull the cuff over a foot several times and confirm it returns to its original opening rather than staying stretched.
- Drawcord end finish and pull resistance: confirm the cord does not fray, and that the end treatment survives normal use.
- Pocket bag visibility and show-through: test with the intended contents, seated and walking, on light-colored shells in particular.
- Seam behaviour at stress points: waistbands, pocket openings, crotch seams and cuffs all need checking for strength and comfort, not just appearance.
Branding Methods on Nylon Shells
Decoration is the last decision and the one most often made too early. Brands pick a logo technique from a mood board, then discover it behaves differently on the actual shell.
Test before you choose
Choose branding after the production shell is confirmed. Lightweight woven nylon can pucker under dense embroidery, coated surfaces can reduce print adhesion, and some shells are sensitive to transfer temperatures. Test the exact artwork on the exact bulk-intended shell, then confirm appearance, adhesion, puckering and wash performance before approving the technique.
It helps to run the decision through the same sequence every time, so the comparison stays honest:
- Shell surface — smooth, textured, crinkled or coated
- Coating or finish, and its temperature sensitivity
- Heat sensitivity of the shell and any adjacent trims
- Stitch density, backing or adhesive type appropriate to the fabric
- Wash test on the finished sample, not on a flat piece of fabric
Where each technique tends to belong
- Embroidery: chest badges, back logos and thigh hits. Thread weight, stitch density and backing have to suit the shell or the fabric will pucker.
- Screen printing: large flat graphics. It needs an ink system suited to nylon and a cure temperature the shell can tolerate.
- Heat transfer and high-density print: clean edges and fine detail on smooth shells. Coated or crinkled surfaces need extra testing.
- Rubber patches and woven labels: strong value signals. Their weight and placement have to match the garment structure — a heavy patch on a very light shell will drag.
- Reflective details: a functional and visual upgrade that suits sport-led sets.
Placement architecture across a two-piece set
Think of the set as one canvas with four zones: chest, back, sleeve and leg. Repeating the same logo in all four is noise. One primary placement and one quiet secondary keeps the set legible — a chest hit and a sleeve mark, for example, or a back logo and a small thigh print.
Write the placement down as a measurement rather than a feeling: distance from the shoulder seam, distance from the center front, finished logo width. Then include it in the pre-production approval pack.
Color Matching Across Shells and Trims
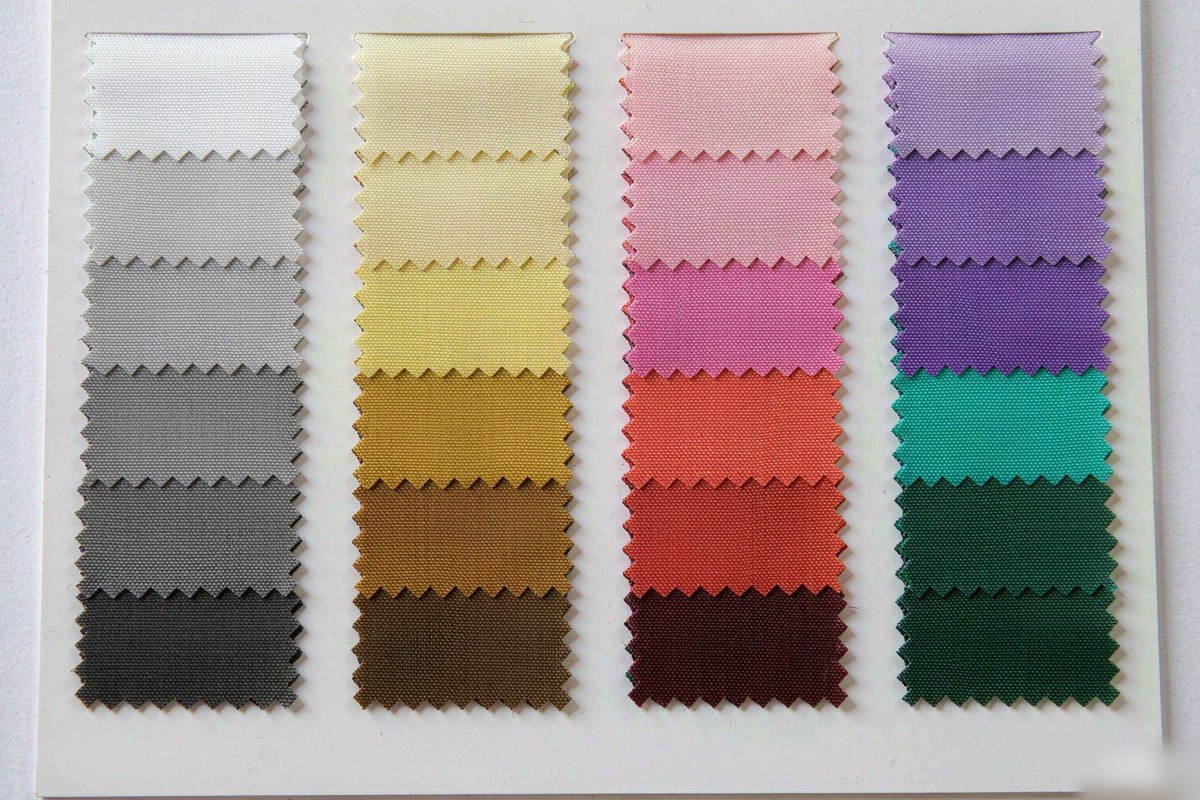
Two pieces cut from different rolls of the same dye lot can still end up visibly different in daylight. This is the most common complaint on a tracksuit set, and it is largely preventable.
Where shade variation comes from, and how to control it
The obvious source is batch-to-batch dyeing, which is why a program with contrast panels should be cut from a single dye lot wherever the volume allows. The subtler causes are what catch people out: different finishes applied to the same base fabric, different constructions between the jacket and the pant, and the simple fact that a vertical seam and a horizontal seam catch light differently.
That last point is worth remembering before you reject a lot. Sometimes the pieces are identical and the lighting is doing the work. Shade is best judged in daylight, side by side, with the pieces laid flat and then folded over each other at the seam.
Set an agreed color tolerance before bulk and review the shell and trims under consistent lighting. Highly visible contrast panels, dark-light combinations and mixed materials usually need closer visual control than low-contrast tonal programs, but the tolerance itself should be agreed with your factory for the specific materials in the program rather than assumed from a general rule. Our guide to lab dip approval and shade variation walks through the process, and the broader color consistency guide covers what to do at bulk stage.
Trims drift too: zipper tape, drawcord and rib
The shell is only part of the color story. Zipper tape, drawcord, cuff rib, pocket lining and even thread color all have to sit in the same palette. Approve them together on a trim card at the same time as the fabric. A set with a perfect shell match and a zipper tape half a shade off will look wrong to every customer, even if nobody can say exactly why.
Sampling, Size Set, PP Sample and Bulk Consistency
Sampling is not one step. It is a sequence of approvals, and treating it as a single "sample" is how sets reach bulk with unresolved problems.
Proto, size set and PP sample: three different jobs
- Proto sample: confirms silhouette, panel layout and general construction. Review collar or hood shape, shoulder line, jacket length relative to the pant, and how the hem sits over the leg.
- Size set: confirms grading for both pieces. Check knee position, rise depth, sleeve length and stride comfort at the smallest and largest sizes on real wearers.
- Pre-production (PP) sample: made in final fabric, final color, final trims and final decoration. This is the reference bulk is measured against, so it should be approved in writing with measurements attached.
For a full set, always review the jacket and the pant together at every stage. Approving them separately is how a set arrives with two slightly different interpretations of "relaxed."
Bulk consistency controls
Once the PP sample is signed, consistency becomes a set of production controls rather than a hope. Lightweight nylon needs controlled tension during spreading and cutting, because fabric stretched at the table shrinks back after cutting and throws off measurements. Needle size, thread, stitch length and presser-foot pressure all need to be locked for the shell. Stress points — waistbands, pocket openings, crotch seams and cuffs — should be confirmed for strength and comfort during pre-production approval.
Final inspection should then be carried out against an agreed quality standard rather than a general visual impression. The inspection plan should define measurement tolerances, workmanship defects, color consistency, trim performance, logo placement and the agreed AQL level where applicable. Our production runs against a defined inspection standard, and the same reference work sits behind our quality control process — see also the nylon tracksuit manufacturing checklist for a point-by-point version of this stage.
What to Send a Nylon Tracksuit Manufacturer
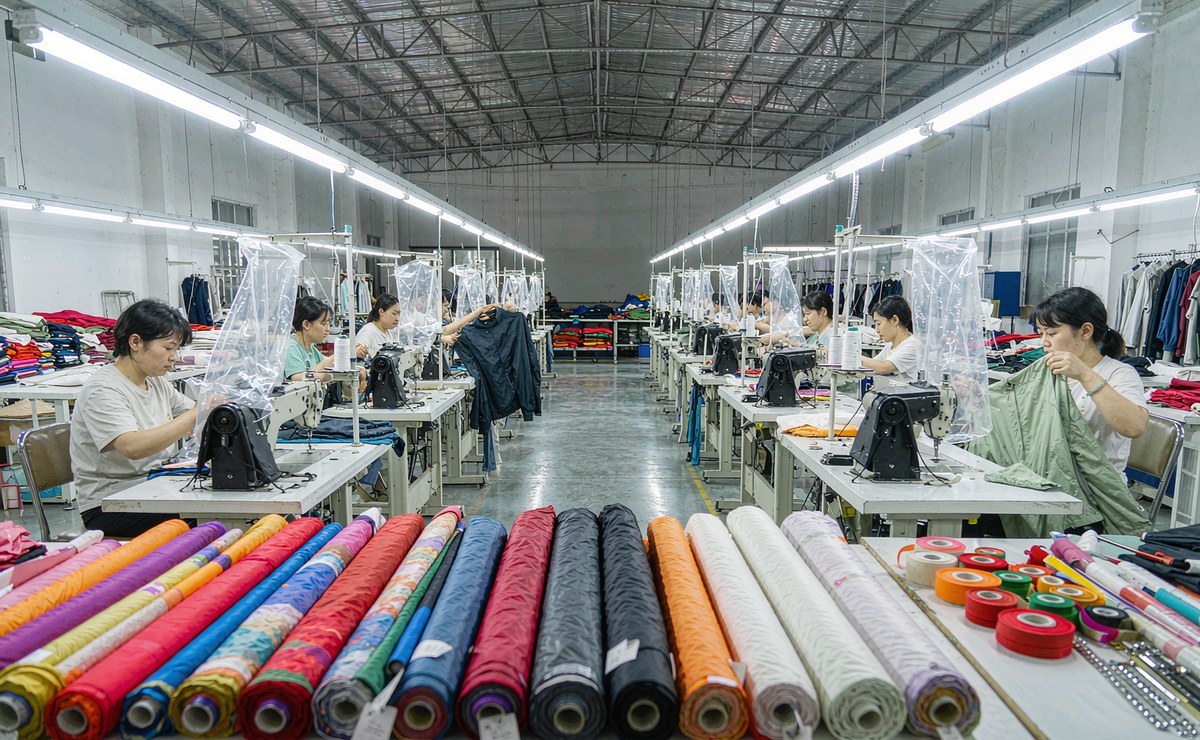
The commercial terms are where most programs either start cleanly or start with a misunderstanding. Two items cause the most confusion: minimum order quantity and lead time — and neither is a number you should read in isolation from the brief that produced it. If you are still deciding whether the set should sit with a specialist tracksuit program or a broader outerwear supplier, the tracksuit manufacturing overview is a useful starting point.
MOQ 100 pieces per color per style
This is a per-color figure, not a per-style figure, and the difference matters. A two-colorway tracksuit set means 100 pieces in each color. A four-colorway program means 400 pieces minimum. That is not a negotiating position; it reflects what custom dyeing, cutting efficiency and production setup actually cost.
If a multi-colorway range is stretching the budget, the practical answer is not a smaller order but consolidation: fewer colors at deeper quantities, which spreads setup cost across more units and usually lands a better unit price than splitting the same total across four colorways. The cost drivers for custom nylon tracksuits is a useful read before you finalise the color count.
Lead time: what actually drives it
Lead time depends on how complete the brief is and whether the fabric and trims are already available. Standard projects move faster when the shell, colors, fit, artwork and trims are confirmed before sampling; custom-dyed fabrics, special finishes, complex panel work or repeated fit revisions all add development time. For reference, a standard program typically runs on roughly 7–10 days for samples and about 25–35 days of bulk production after the pre-production sample is confirmed, with complex development potentially extending the sampling stage to 15–25 days.
Confirm the sample and bulk schedule with the factory before you fix your launch date. A great sample that arrives three weeks before your drop is not helpful, and our service process shows how the stages connect end to end.
The brief that produces an accurate quote
- Intended use: travel, studio, daily wear, team uniform or statement piece.
- Target market, climate and size range, including any extended sizing.
- Shell direction with construction, target weight and finish, plus a swatch or reference garment if you have one.
- Lining strategy: mesh, taffeta, partial or none.
- Color map showing which panels are contrast and which are base.
- Artwork files with scale and placement marked, and your preferred decoration technique.
- Fit reference: images, an existing garment, or a measurement chart.
- Quantity by color, destination country and target timeline.
The more of that you can supply, the fewer sample rounds you will need. If you are still comparing suppliers, our OEM/ODM services and private label programs both describe how the same information is used at the quoting stage.
Pre-Bulk Approval Checklist
Sign these off before bulk cutting starts
- Approved fabric swatch, retained and labelled, with composition, construction, weight and finish recorded
- Trim card covering zipper tape, drawcord, rib, pocket lining and thread
- Signed measurement chart with a tolerance for every point of measure
- Logo placement map with measured positions for every decoration
- Color standard approved under at least two light sources
- Signed PP sample retained as the bulk reference
- Panel alignment confirmed across jacket and pant as one visual system
- Care method defined and wash-tested on the finished sample
- Inspection standard and acceptance criteria agreed in writing
Conclusion: A Tracksuit Set Is Won in the Spec Sheet
Nylon tracksuits look like a design problem and behave like an engineering problem. The fabric choice sets the tone, but construction, weight and finish decide how it feels. The panel layout creates the look, but seam allowance, alignment and topstitch position decide whether it still looks sharp after five washes. The color story sells it in a photo, but dye lot discipline and trim matching decide whether the customer keeps it.
So the takeaway is short. Specify before you sample. Approve on the real garment, not on a screen. Review the jacket and the pant together at every stage. And write down every standard you care about — because an unstated standard is not a standard, it is a hope.
Get those four habits into your development process and the set almost builds itself. Skip them and you will spend the season fixing a tracksuit that was never quite right. If you want to move from concept to sample with a partner who works this way, start with the finished references in our nylon tracksuit collection or the wider custom tracksuit range.
Frequently Asked Questions About Nylon Tracksuit Development
What fabric is best for a custom nylon tracksuit?
There is no single best shell. Taffeta suits classic track jackets and print-heavy designs, tricot suits closer or performance-leaning fits, ripstop reads technical, and crinkle suits statement pieces. Choose by construction, finished weight and finish, then approve a physical swatch.
How do you keep the jacket and pants the same color?
Cut both pieces from a single dye lot wherever volume allows, and approve the shell and every trim — zipper tape, drawcord, rib, thread — on one card under at least two light sources. Most mismatches come from trims that were never checked against the shell.
Can you embroider or heat transfer on nylon?
Usually yes, but not by assumption. Dense embroidery can pucker lightweight woven nylon, coated surfaces can reduce print adhesion, and some shells are temperature-sensitive. Test the exact artwork on the exact bulk shell and wash it before approving the technique.
What should be approved before bulk production?
The fabric swatch, trim card, measurement chart with tolerances, logo placement map, color standard and the signed pre-production sample. Also confirm panel alignment across the jacket and pant, and wash-test the care method on the finished sample.
How long does custom nylon tracksuit sampling and production take?
A standard program typically runs on roughly 7–10 days for samples and about 25–35 days of bulk production after the pre-production sample is confirmed. Custom-dyed fabric, special finishes, complex panel work or repeated revisions add development time.
What information should I send a tracksuit manufacturer for a quote?
Your tech pack or reference garment, color map, artwork with placement marked, fit reference, size range, quantity by color, destination country, target timeline and target budget. Better inputs mean fewer sample rounds and a more accurate quote on the first pass.
Ready to Develop a Custom Nylon Tracksuit Set?
Send your tech pack or reference garment, your color map and your quantity by colorway. We will come back with the shell, lining and trim combination that fits your program, plus a sampling and bulk schedule.